Get a fresh start with a new lyric writing notebook — and all the inspiration that brings.
Songwriters get stuck all the time. Sometimes you get stuck at the beginning, unsure of how to start. Other times, you get stuck in the middle of a song, unsure of how to finish.
Organizing a new notebook might not solve every creative challenge that you’ll face as a songwriter, but it will help you face those challenges on solid ground. Starting a new notebook also gives you a fresh start, and fresh starts are inspiring.
By the end of this tutorial, you’ll be the proud owner of a lyric writing binder that:
- Captures all your great lyric ideas for later reference
- Keeps all your lyrics-in-progress within easy reach
- Archives your finished lyrics in one place
This binder will help take your lyric all the way from idea to draft, then from draft to done. Let’s get started.
Step 1: Get your supplies
Is there anything more intriguing to the imagination than a new notebook and a fresh box of pencils? All those blank pages. All those possibilities.
To set up your new songwriting notebook, you’ll need some supplies:
- One binder
- A stack of filler paper
- One package of tabbed section dividers
- A box of pens or pencils
- One little pocket-sized spiral notebook
All of these things are affordable and easy to find.
I recommend a binder because it’s more flexible than a bound notebook — you can add and remove pages easily. You could technically just create three folders on your hard drive instead, but I hope I can entice you to try a real-life binder for lyrics.
A binder won’t tempt you with video games; it won’t ping you with email messages; it won’t barf up Facebook messages while you’re trying to write your damn song. For some it’s an acquired taste, but I bet you’ll like the feeling of your pen on the page, with no distractions.
Step 2: Set up your binder sections
Now that you’ve got all your supplies, use your new tabbed dividers to create three sections:
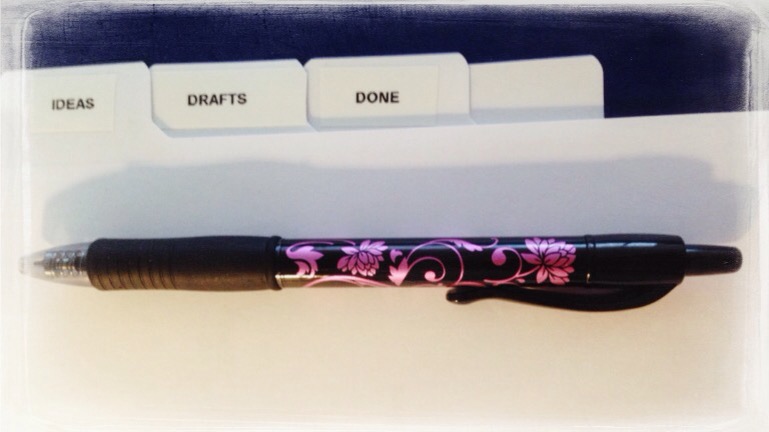
- IDEAS: This section’s for storing loose notes and ideas that you’ll revisit later — everything from raw observations to grand concept album ideas. Go for quantity in this section; you can worry about *quality* later.
- DRAFTS: This section will hold drafts of lyrics that still need work, or need to be drafted again. This is where the dots from your IDEAS section into something more cohesive and satisfying.
- DONE: This section’s for lyrics that are finished, and don’t need your immediate attention.
Setting up these three tabs will take you all of 27 seconds, but it’ll really streamline your lyric writing sessions. Separating your IDEAS from your DRAFTS really cuts down on clutter and protects your creative energy.
Let’s say you’re sitting down for a lyric writing session later today. Just flip to the DRAFTS section of your notebook, and within seconds you’ll be ready to resume work on that most recent song that you’re stoked about. If you get stumped, you can flip through your IDEAS section to see if there’s anything helpful there. Meanwhile, all your finished lyrics are hanging out in the back section, ready for you to set them to music or perform them at an open mic. Until then, they’re out of your way.
This is so much more fruitful than having to deal with a notebook full of false starts, finished works, and drafts all mixed together in a mess.
Trust me — do yourself a favor and separate your notebook into these three sections: IDEAS, DRAFTS, and DONE. Then when you sit down you can just flip your notebook open, see which songs need your attention, and get to work. It’ll save you a lot of time and heartache. Those tabbed dividers are pure gold.
Step 3: Create a songwriting field kit to capture ideas on the go
Finally, you’ll need a little field kit for capturing ideas on the go. A simple pocket notebook (spiralbound) and pen can be your home away from home.
Yes, I know cell phones can store notes. But scribbling an idea down on a piece of paper is still faster than pecking at a smartphone keyboard. Just throw that little notebook in your purse or slip it into your pocket whenever you leave the house. You never know when ideas will strike: some ideas will be about your songs already in progress; others will be entirely new.
When you get home at the end of the day, you can open your binder and copy each new idea into your IDEAS section or add it to one of your DRAFTS. If you like, you could even just tear the page out of your pocket notebook and tape it to a page in your binder. Whatever works. Just be sure to empty out your pocket notebook regularly so that it opens to clean pages.
Go write
You’re done! If you followed each step, you’ve now got a fully functional songwriting notebook that will store your best ideas, give you room to develop them into drafts, and then show off the finished lyric. Most importantly, it separates the songs that need your attention from the ones that don’t, so you can have an instantly productive lyric writing session every time you open the book.
Now that your lyric ideas have a place to live, breathe, and grow, you may discover a stream of new ideas. Catch those sparks in IDEAS and kindle them into DRAFTS. If all goes well, that little idea will journey all the way to DONE. Then you’re on to the next song.